
One board. A setup you can follow.
Keep the model, the face you machine and the file you download connected. Start with a separate practice project and preserve your current work.
- 01
Choose the physical setup
Open Make → Shaper Origin. Jobs are grouped by board, machining face and bit. Select a cut within the setup; review any operations listed without generated SVGs. Mortise-and-tenon, box-joint and eligible profile cuts are supported.
- 02
Read the face and datum
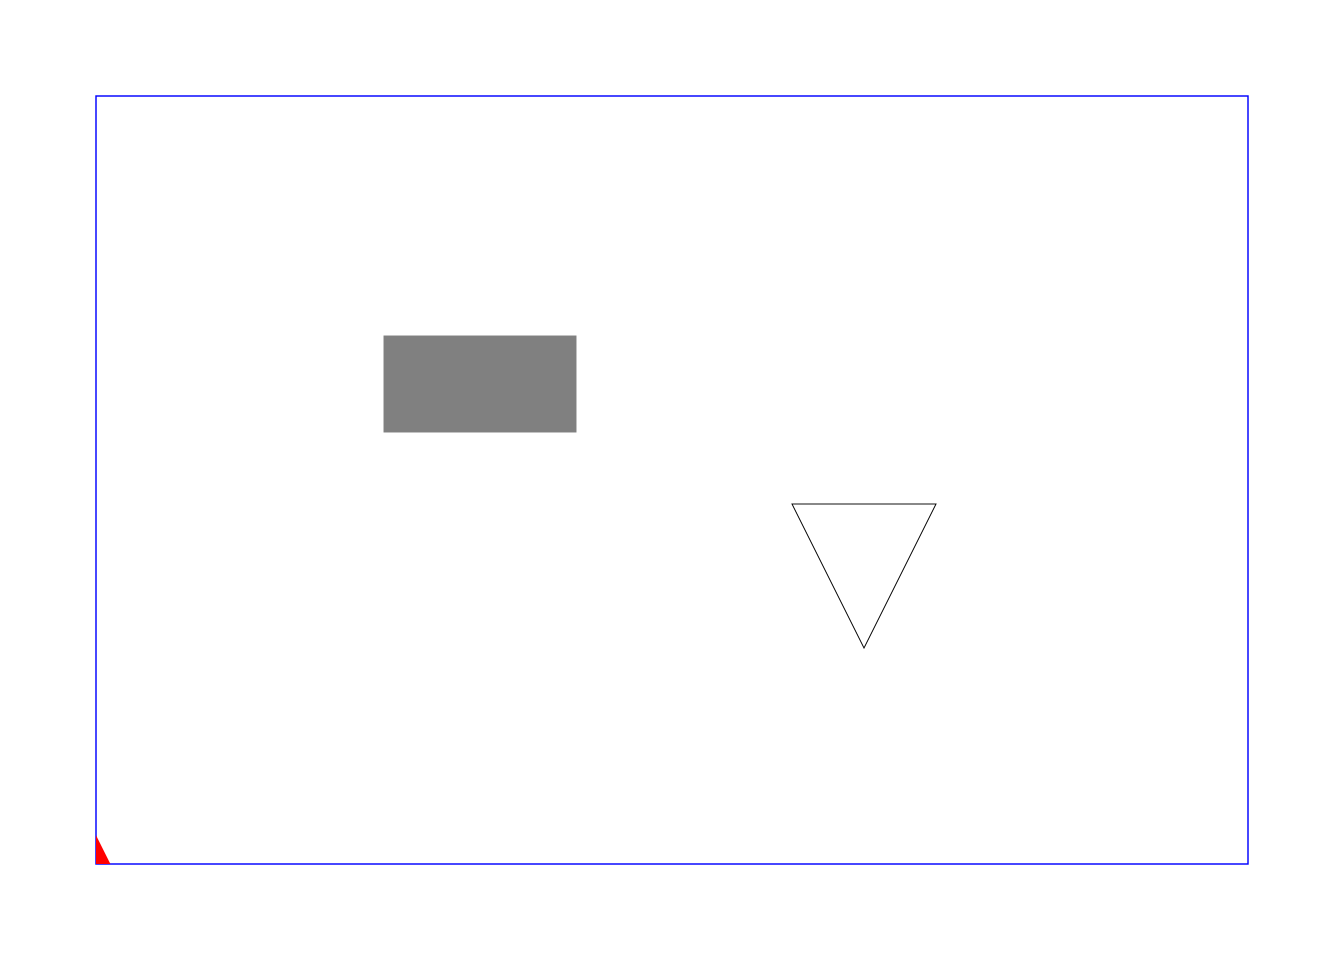
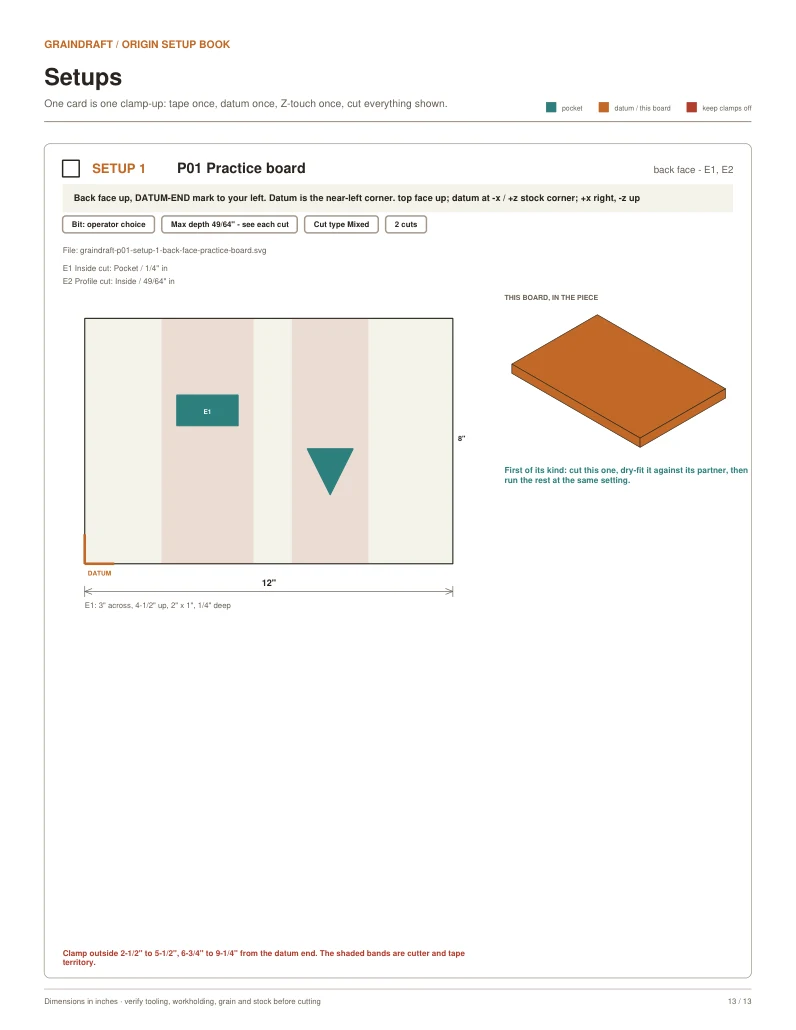
Open Setup to see the exact exported geometry. Match the named face and stock corner to your board. The red triangle identifies the custom anchor; its right-angle vertex is the datum. Blue shapes are guides, gray filled shapes are pockets, and white shapes with black outlines are inside cuts.
- 03
Check each cut
Read the strategy and depth for every operation. A setup can contain both a blind pocket and a through cut; its maximum depth is not the depth for every path. Confirm actual milled stock, installed bit and clearance.
- 04
Take matching files to the shop
Download the setup SVG directly, or choose Shaper Origin or Every method in the Shop packet dialog, then open More options and turn on Origin setup pages and matching SVG files. The ZIP includes the PDF, setup files and a manifest from one captured model state.
- 05
Place and verify on Origin
Transfer the SVG using your usual Shaper file workflow. Secure the work, scan tape, select the custom datum anchor, verify dimensions and orientation, and set the bit and Z Touch. Check encoded depths and cut types on-tool. Use a spoilboard for through cuts and make a scrap test before project stock.
- 06
Keep revisions traceable
Studio can refine a file separately. Attach a self-contained SVG with inch or millimeter dimensions to the matching face. GrainDraft records whether its source setup has changed and lets you download or remove the revision. It does not replace the parametric model or silently substitute revised cut files.
GrainDraft is meant for a computer or tablet. On a phone it works, but the screen is tight.
Opening the editor does not load this example or replace your project. GrainDraft exports locally; Shaper services have their own account requirements.
The setup and the cut file belong together.
Choose the board, inspect the exact face and datum, then download its setup SVG. Add Origin setup pages and matching files to your shop packet to keep the bench instructions with the work.
Software-checked example, not physically cut on Origin. Confirm scale, anchor, bit, cut type, depth and workholding before a scrap test. Only supported operations generate SVGs; other work is listed separately.